> For the complete documentation index, see [llms.txt](https://help.fluorescent.co/llms.txt). Markdown versions of documentation pages are available by appending `.md` to page URLs; this page is available as [Markdown](https://help.fluorescent.co/cornerstone/pages/templates/blog-posts-template.md).
# Blog posts
Template
The **Blog Post template** provides the design and layout of your blog post articles. Publish **Blog posts** to share store announcements, updates, and featured content, and help increase organic traffic to your site.
{% hint style="info" %}
Check out Shopify's guide on [How to start a blog and grow your audience](https://www.shopify.com/blog/how-to-start-a-blog).
{% endhint %}
## **Add blog posts in Shopify admin**
***
Before editing the **Blog post template**, you need to add at least one blog post in your Shopify admin.
Blog posts use the **Featured image**, **Title**, **Content**, **Tags**, **Published date** and **Author**.
{% hint style="success" %}
Blog posts are a Shopify feature. Learn how to [create a blog](https://help.shopify.com/en/manual/online-store/blogs/adding-a-blog) and add [blog posts](https://help.shopify.com/en/manual/online-store/blogs/writing-blogs).
{% endhint %}
## **Edit blog posts template**
***
In your theme editor (**Customize**), use the **Templates selector** to open **Blogs > Default blog posts**.
STEPS
In your theme editor (**Customize**):
1. Use the **Templates selector** to open **Blog posts > Default blog posts**.

2. Click **Change** in the "PREVIEW" section to select which blog post to preview while making edits.
3. Under **Template**, click the **Blog posts** section to open the settings.
4. Choose to display post content as **Full width** or select a **Custom** width.
> Use the **Custom content width** slider to increase or decrease the width in pixels.
5. Click the **Title** block to choose which blog post details to display.
> Choose whether to **Show tags**, **Show author**, or **Show published date** of the blog post.
6. (*Optional*.) Click **Social sharing** to change the default "Share" **Text**.
7. Under **Template**, click **(+) Add section** to further customize your blog posts template with theme sections.
> **Note**: Your changes will apply to all blog posts.
> Click and hold the drag and drop handles **`⋮⋮`** to change the order of sections.
8. Click **Save**.
### **Edit featured image**
***
The blog posts template display the **featured image** added in your Shopify admin. Go to your Shopify admin to upload images for your blog posts.
You can choose to display a **Full width** feature image, set a **Custom image height**, and define the **focal point** of your image.
STEPS
In your theme editor (**Customize**):
1. Click **Enable full width image** to make the image span across the entire screen or browser.
2. (*Optional*.) Choose to use the **Original** image height (without cropping) or set a **Custom image height**.
> Adjust the **Custom height** sliders between 50% to 100% of the maximum height of the screen or browser.
3. Use **Image focal points** to specify the main focus of the image. The focal point of your image will remain centered and within frame when your site adapts to different screen sizes.
> We recommend using the [From image setting](/cornerstone/general/image-guide/theme-image-settings.md#from-image) since each blog post will have a different featured image.
4. Click **Save**.
### **Enable post comments**
***
In the Shopify admin, you can choose to enable comments. Cornerstone displays a simple comment form with fields for Name, Email, and Message.
{% hint style="success" %}
Blog posts comments are a Shopify feature. See Shopify's guides for [Managing comments on blog posts](https://help.shopify.com/en/manual/online-store/blogs/managing-comments).
{% endhint %}
## Edit default theme text
***
In the Shopify admin, you can change the default text used in the blog posts template. Use the **Default theme content editor** to edit or remove text to match the tone and needs of your store.
> Learn more about [editing default them content](/cornerstone/general/adapting-your-theme/edit-default-theme-content.md).
{% hint style="danger" %}
**Do not change** any text that's inside curly brackets **`{{ }}`** or HTML tags **`< >`**. Changing this text will break the functionality of the theme.
{% endhint %}
STEPS
In your theme editor (**Customize**):
1. Click **Actions** (**`...`**) > **Edit default theme content**.
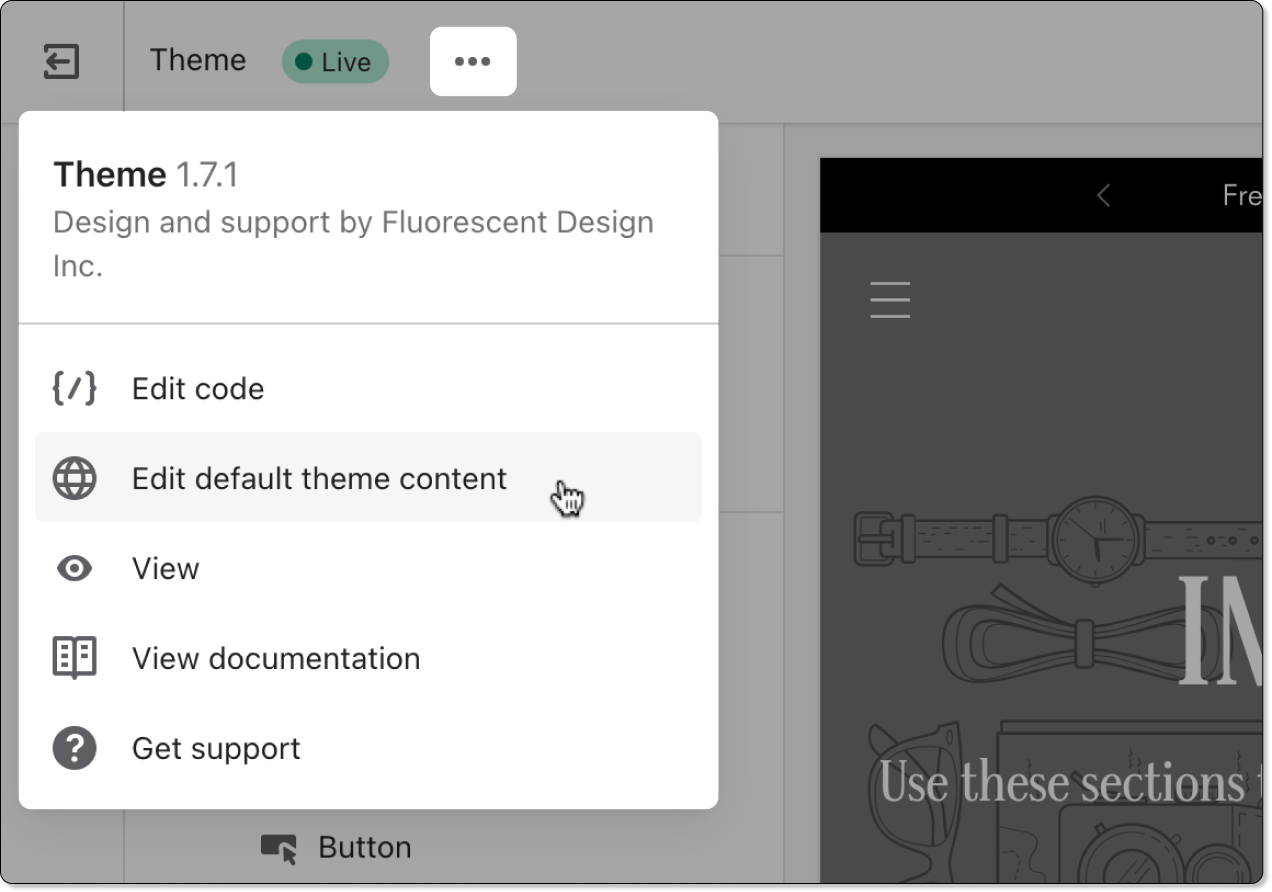
> You can also access the theme content editor from your **Shopify admin**. Go to **Online store** > **Themes**, and Click **Actions** **`...`** next to the theme you want to edit.
2. Click on the **Blogs** tab or search for default text.

3. Edit the text you want to change in the available fields.
> Do not change text inside brackets **`{{ }}`** or HTML link tags (**``** and **``**). Changing them will break the functionality of the theme.
> To remove default text, use your space bar to replace the text with a single space.
4. Click **Save**.
\\
***
> **Related links**
>
> [Templates](/cornerstone/pages/templates.md)