> For the complete documentation index, see [llms.txt](https://help.fluorescent.co/llms.txt). Markdown versions of documentation pages are available by appending `.md` to page URLs; this page is available as [Markdown](https://help.fluorescent.co/cornerstone/pages/theme-sections/collection-list.md).

# Collection list

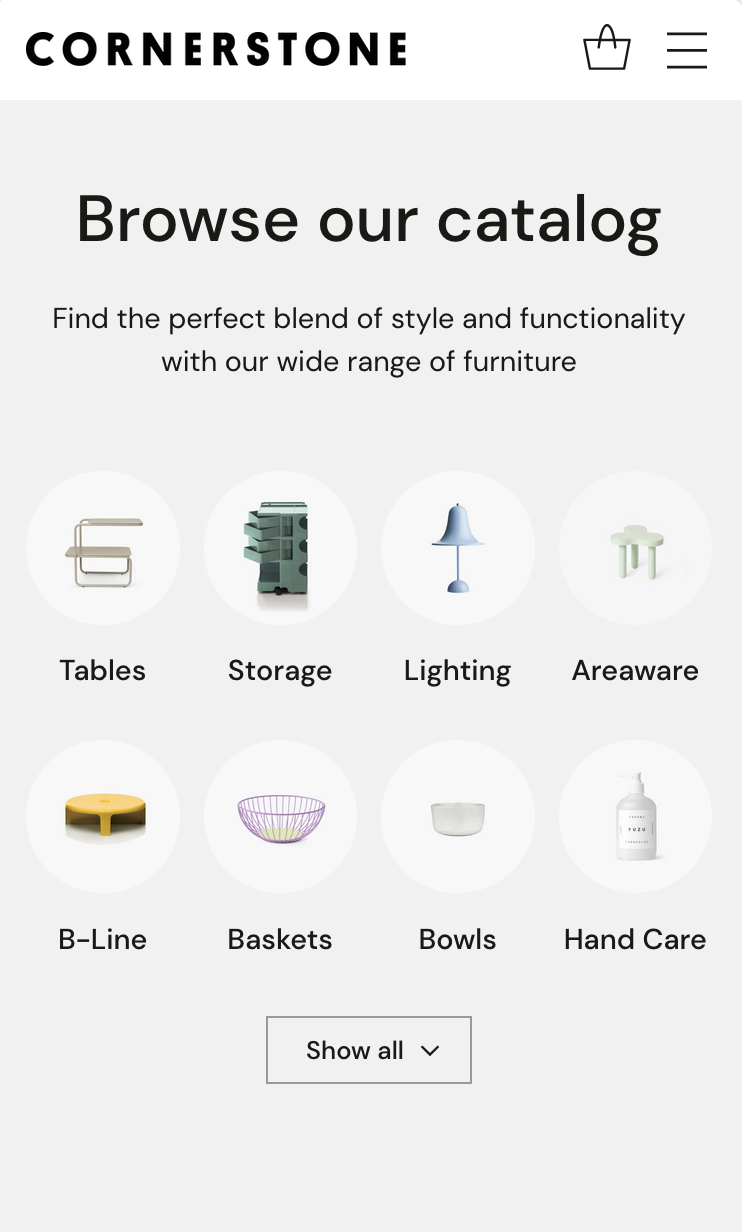
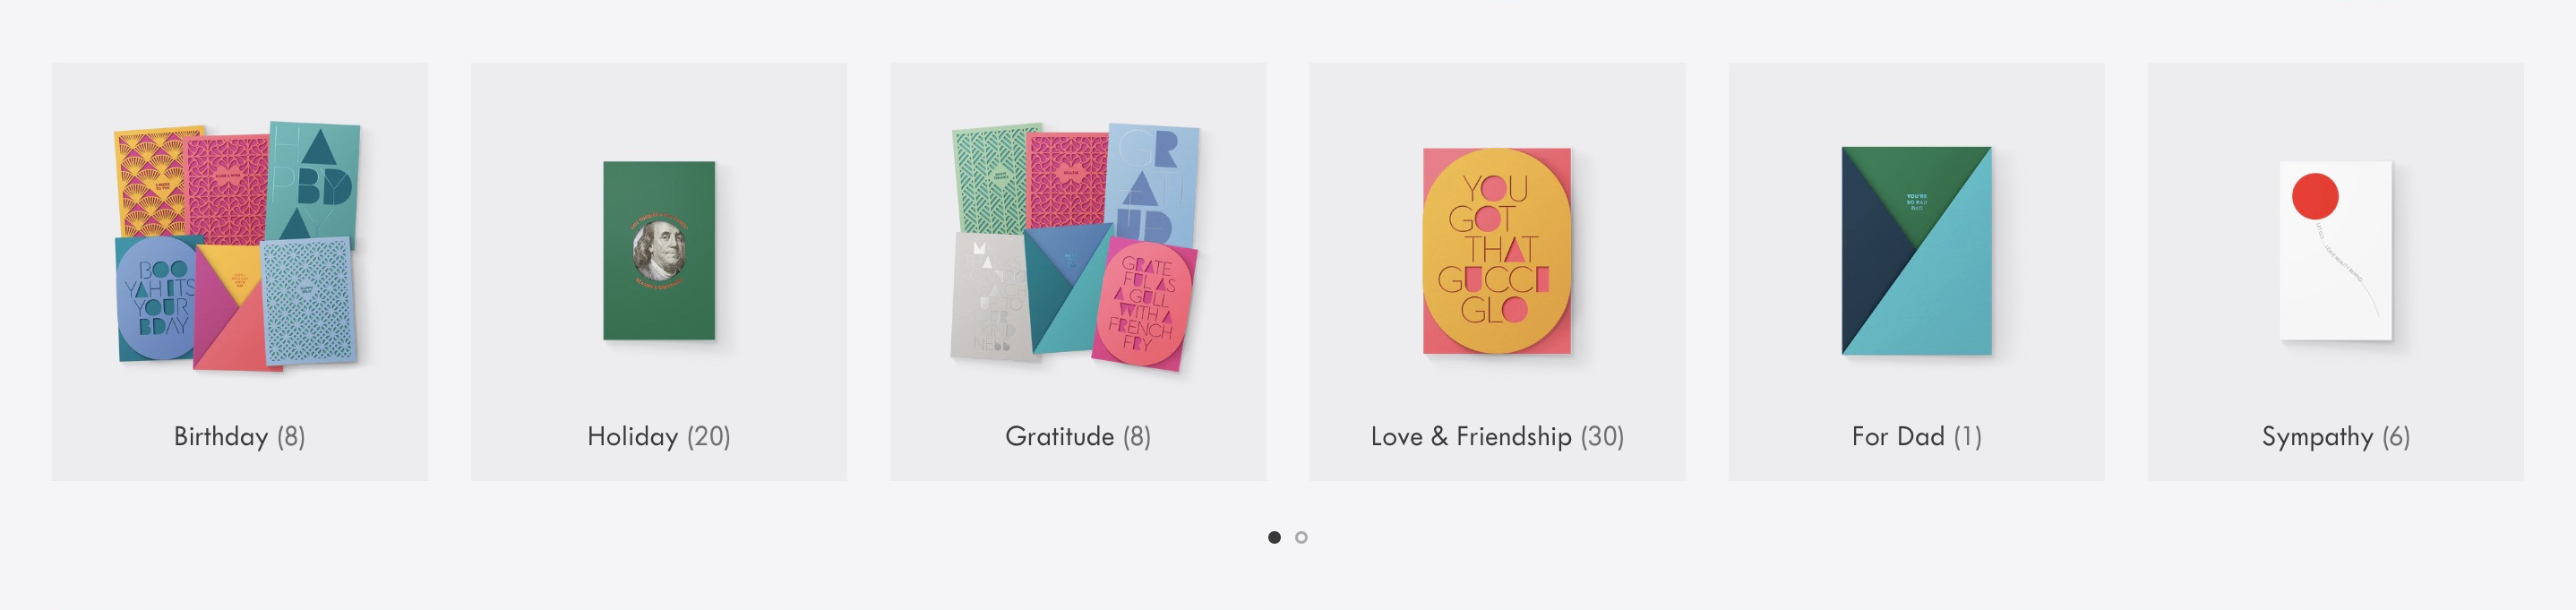
Use the **Collection list** section to display selected collections as either a grid or as a single-row slider that visitors can click or swipe through.

{% hint style="info" %}
Check out the [Collection list buttons](/cornerstone/pages/theme-sections/collection-list-buttons.md) section for an alternate style to feature your collections.
{% endhint %}

<figure><img src="/files/sumFhD6k7EhO6yTWEyar" alt=""><figcaption></figcaption></figure>

<figure><img src="/files/5yhad8QhWmsBUMqR72YP" alt=""><figcaption></figcaption></figure>

{% hint style="warning" %}
**Editing templates will change all pages that use the same template**. [Create new templates](/cornerstone/general/editing-themes/using-templates.md#create-and-assign-multiple-templates) for different page layouts, or [show dynamic page content](/cornerstone/general/adapting-your-theme/dynamic-content-with-metafields.md) in the same template.
{% endhint %}

## Set up section

***

In the editor side panel, click **(+) Add section** and select **Collection list**. Click and hold the drag handles **`⋮⋮`** to re-order sections.

### Section styles

Sections include general styles. Click the section to find options for **spacing**, and **animations**.

<table data-view="cards"><thead><tr><th align="center"></th><th data-hidden data-type="content-ref"></th></tr></thead><tbody><tr><td align="center"><mark style="color:blue;"><strong>Section spacing</strong></mark></td><td><a href="/pages/CBsbGCpJAMAjEg83Oxwb#section-padding">/pages/CBsbGCpJAMAjEg83Oxwb#section-padding</a></td></tr><tr><td align="center"><mark style="color:blue;"><strong>Section animations</strong></mark></td><td><a href="/pages/CBsbGCpJAMAjEg83Oxwb#section-animations">/pages/CBsbGCpJAMAjEg83Oxwb#section-animations</a></td></tr></tbody></table>

### Select feature collections

***

Select multiple **Collections** to display with featured collection images that link to those collections.

{% hint style="info" %}
We recommend adding a **Collection image** in your Shopify Admin. If no image is set, Cornerstone will use a product image from that collection by default.
{% endhint %}

<details>

<summary><mark style="color:blue;"><strong>STEPS</strong></mark></summary>

In your theme editor (**Customize**):

1. Click on **Collection list** to open the section settings.
2. Under the **Collection listing**, use the **Select collections** button to check off all the collections you want to feature.
3. Select the **Number of columns** for both *desktop* and *mobile*

   > The size of the collection images will change according to the number of columns.
4. In the **Collection list**, click and hold the drag-and-drop handles **`⋮⋮`** to reorder your collections.
5. Click **Save**.

</details>

## Collection items style

***

Customize the appearance of collection items, titles, and images.

* Show collection items with an **outline**, **color background**, or **plain**.
* Choose which **images** to use and change their shape
* Show the **number of products** in each collection
* Adjust the **title font** and **alignment**

`Click section to find settings`

<table><thead><tr><th width="188">Setting</th><th>Description</th></tr></thead><tbody><tr><td><mark style="color:blue;">Show product counts</mark></td><td>Choose to display the number of products in each collection.</td></tr><tr><td><mark style="color:blue;">Style</mark></td><td>Choose to display collection items with a simple border (<strong>Outlined</strong>), a solid color background (<strong>Filled</strong>), or without a border or background (<strong>Plain</strong>).</td></tr><tr><td><mark style="color:blue;">Image source</mark></td><td>Choose to display the Collection image or First product image for the collection items.</td></tr><tr><td><mark style="color:blue;">Image aspect ratio</mark></td><td>Choose to crop all images to be a single uniform shape. Select Portrait (2:3), Portrait (4:5), Square (1:1), Landscape (5:4), or Landscape (3:2). Select Natural to display images in their original shape (without cropping).<br><br>Learn more about aspect ratios in our <a href="/pages/W1limMa3a6HViAgYU6Ns#image-aspect-ratio">Image settings guide</a>.</td></tr><tr><td><mark style="color:blue;">Apply circle crop to images</mark></td><td>Choose to crop all images to appear as circles. This setting applies only when the Image aspect ratio is set to Square.</td></tr><tr><td><mark style="color:blue;">Image spacing</mark></td><td>Change the spacing around the images. Select Comfortable for more spacing or Compact for less.</td></tr><tr><td><mark style="color:blue;">Title font</mark></td><td>Set the collection title font to the Body or Heading font selected in your theme settings.</td></tr><tr><td><mark style="color:blue;">Title alignment</mark></td><td>Display headings either to the Left, Center, or Right, underneath the collection item image.</td></tr></tbody></table>

## Section layout

***

Change the layout of collection lists items to fit how many collections you have and the style you want.

* Display collection items as a **Grid** or single-row **Slider**
* Choose the **Number of columns and rows** for mobile and desktop

<div><figure><img src="/files/v0GkuCYI9GfLOZ9xwga2" alt="" width="186"><figcaption><p>Mobile 4 column layout</p></figcaption></figure> <figure><img src="/files/QxwLPVGm7vLimsKhKpZQ" alt="" width="187"><figcaption><p>Mobile slider enabled</p></figcaption></figure></div>

`Click section to find settings`

<table><thead><tr><th width="244">Setting</th><th>Description</th></tr></thead><tbody><tr><td><mark style="color:blue;">Number of columns on desktop</mark></td><td>Choose how many collections to show per row on desktop screens: either <strong>4</strong>, <strong>5</strong>, or <strong>6</strong> columns.</td></tr><tr><td><mark style="color:blue;">Number of rows on desktop</mark></td><td><p>Choose how many rows of collection items to display on desktop screens. <strong>Show all rows</strong> or limit the initial number of rows between <strong>1</strong> and <strong>5</strong>. A “Show all” button will reveal additional rows.<br></p><p>This settings does not apply if you enable the slider.</p></td></tr><tr><td><mark style="color:blue;">Enable slider on desktop</mark></td><td>Display collection list items in a single-row carousel that visitors can rotate through.</td></tr><tr><td><mark style="color:blue;">Number of columns on mobile</mark></td><td>Choose how many collections to show per row on mobile screens: either <strong>2</strong>, <strong>3</strong>, or <strong>4</strong> columns.</td></tr><tr><td><mark style="color:blue;">Number of rows on mobile</mark></td><td><p>Choose how many rows of collection items to display on mobile. <strong>Show all rows</strong> or limit the initial number of rows between <strong>2</strong> and <strong>5</strong>. A “Show all” button will reveal additional rows.<br></p><p>This settings does not apply if you enable the slider.</p></td></tr><tr><td><mark style="color:blue;">Enable slider on mobile</mark></td><td>Display collection list items in a single-row carousel that visitors can swipe left and right view more.</td></tr></tbody></table>

## Section header

***

Add section **headings** and an optional **button** above the collection list.

<details>

<summary><mark style="color:blue;"><strong>STEPS</strong></mark></summary>

In your theme editor (**Customize**):

1. Click on **Collection list** to open the section settings.
2. Enter **Accent** text to display a small label above the heading.
3. Enter **Heading** text to display a section title in the top-left.

   > The default heading is "Collection list."
4. Enter **Subheading** text to display below the heading.

   > Use the formatting buttons to add text styles, links, or lists. To learn more, see Shopify's [Rich text editor guide](https://help.shopify.com/en/manual/shopify-admin/productivity-tools/rich-text-editor#format-text-with-the-rich-text-editor).
5. Select or paste a URL for the **Button Link**.

   > The link is set to "All collections" by default. You can customize your list of collections in the Collections list template.
6. Change the **Button label** (e.g. "View all collections").

   > Leave this field blank to remove the button.

   > The most effective button labels ask customers to do something (e.g. Get started, Join us, Shop now). To learn more, [read "What is a Call to Action?"](https://www.thebalancesmb.com/call-to-action-1794380)
7. Click **Save**.

</details>

<table><thead><tr><th width="239">Setting</th><th>Description</th></tr></thead><tbody><tr><td><mark style="color:blue;">Center header content</mark></td><td>Display headings in the center above the section. Uncheck this option to align headings to the left.</td></tr><tr><td><mark style="color:blue;">Accent</mark></td><td>Add text to show a small heading above the main section heading.</td></tr><tr><td><mark style="color:blue;">Heading</mark></td><td>Add text to show a main heading above the section.</td></tr><tr><td><mark style="color:blue;">Subheading</mark></td><td>Add text to show a subheading below the main heading.</td></tr><tr><td><mark style="color:blue;">Maximum text width</mark></td><td>Set the maximum width of heading text between 400 and 1000 pixels.</td></tr></tbody></table>

\\

***

> **Related links**
>
> [Collection list buttons](/cornerstone/pages/theme-sections/collection-list-buttons.md)\
> [Collection list page](/cornerstone/pages/templates/collections-list-page.md)\
> [Featured collection](/cornerstone/pages/theme-sections/featured-collection.md)\
> [Featured collection with media](/cornerstone/pages/theme-sections/featured-collection-with-media.md)